")
.NET 8 Migrations Made Easy
Over the last 12 months, I’ve been involved in several large .NET 8 Migrations. Diving into .NET 8 has been quite the journey and an amazing experience. Migrating to .NET 8 brings better cross-platform compatibility (welcome Macbooks for development and Linux for deployment) and improved performance.
There are 2 main ways to do the migrations:
- For small applications, you should go for the big bang approach (rewrite the application), aka lock the developers in the room for a couple of weeks and shove pizza under the door🍕
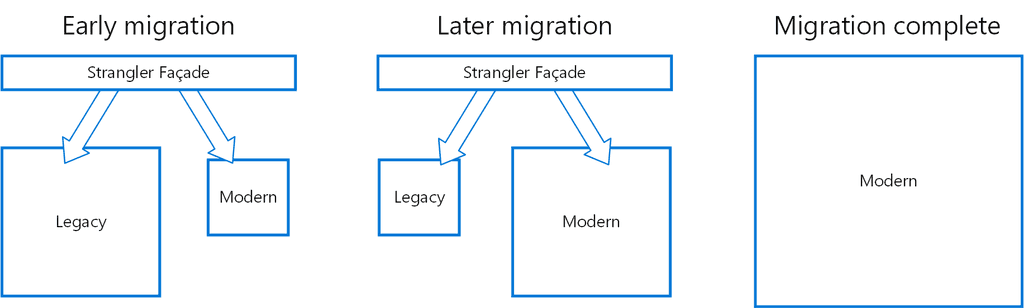
- Enterprise projects don’t have a large enough pizza budget, and no appetite for that type of all-or-nothing risk. Therefore the better approach is to use the Strangler Fig Strategy (migrate bit by bit and deploy)
.NET 8 is awesome. If you want to know more about why you should migrate to .NET 8, check out this Rule:
Do you know why to upgrade from .NET Framework to the latest .NET?

SSW Internal Migration Projects
Here are some details about a couple of projects we are migrating:
| SugarLearning.com | sswtimePro.com | |
| Functionality | Employee onboarding system | Timesheet and invoicing system |
| Previous .NET version | .NET Framework 4.8 | .NET Framework 4.7.2 |
| Target .NET version ⭐ | .NET 8 | .NET 8 |
| Previous Database ORM | EF6 Code-First | EF6 EDMX Database-First |
| Target Database ORM ⭐ | EF Core 8 | EF Core 8 |
| Previous Frontend | Angular 8 | Angular 10 |
| Target Frontend ⭐ | Angular 17 | Angular 17 |
| Features | Multitenancy, background jobs | Multitenancy, background jobs |
| External Dependencies | IdentityServer, YouTube, Azure Search | Dynamics 365, SharePoint, Xero, Azure DevOps, Power BI, Twitter, RSS |
| Design pattern | Clean Architecture | Clean Architecture |
| Hosting | Azure | On-Prem |
| Application start year | 2015 (9 years old) | 2001 (23 years old) |
Planning Your Migration
#1 Migration Strategy
Firstly, review your application architecture to find the most suitable migration strategy. At SSW, we are using the Strangler Fig pattern and an evolutionary methodology as our migration strategy for both projects. This choice is intentional, ensuring a smooth and controlled transition avoiding the possible issues that can arise from a sudden big change. Step-by-step migration minimizes risks and underscores your commitment to delivering upgrades and an optimized project. This approach allows parallel testing to confirm proper functionality while allowing ongoing development on the old application.
If you want to learn more about this read this Rule – Modernize Your App
Tip: this pattern can be used when migrating websites to a new architecture. You can place a reverse proxy such as Azure Front Door or YARP in front of your website (Do you know how to configure YARP?) to route traffic. Once a page (or route) on the new website is ready – you can configure the reverse proxy to direct traffic to the new website.
#2 Migration – Identify Technical Debt in Your Project
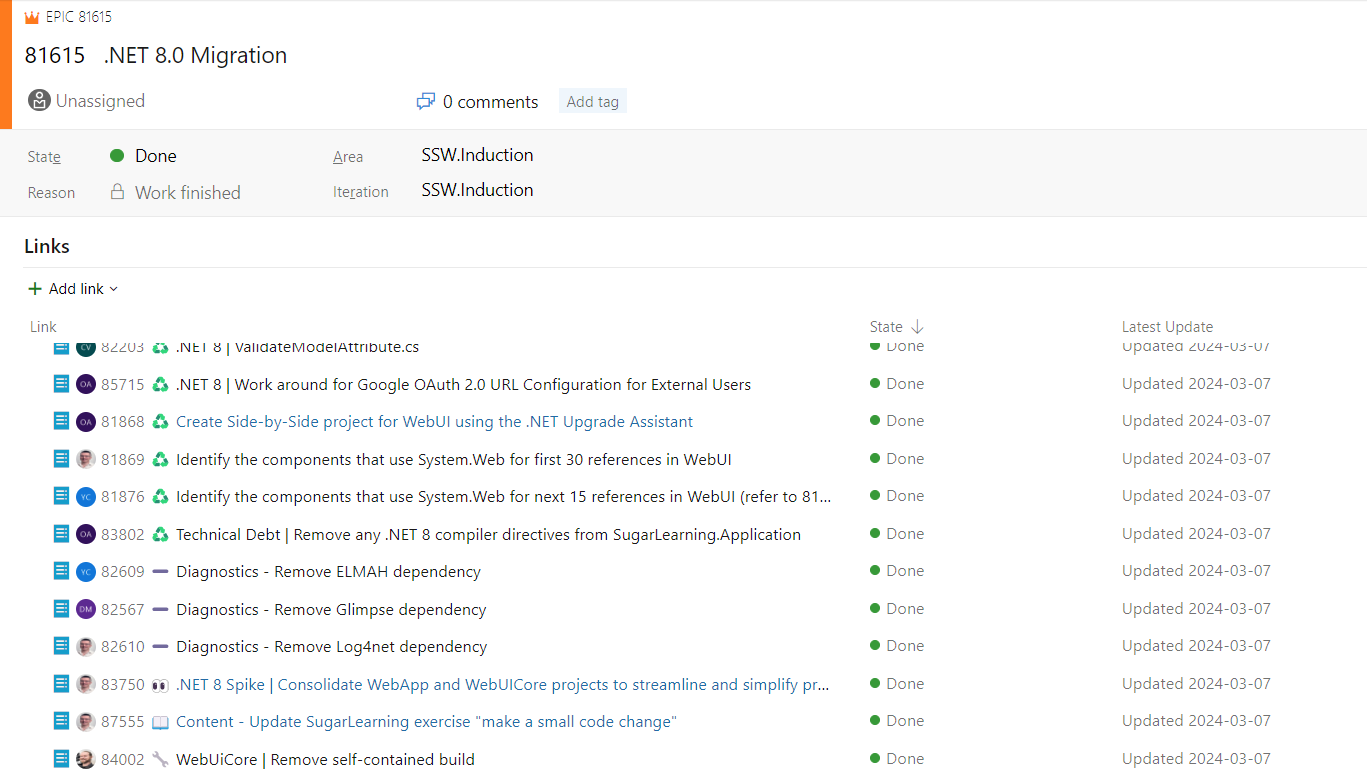
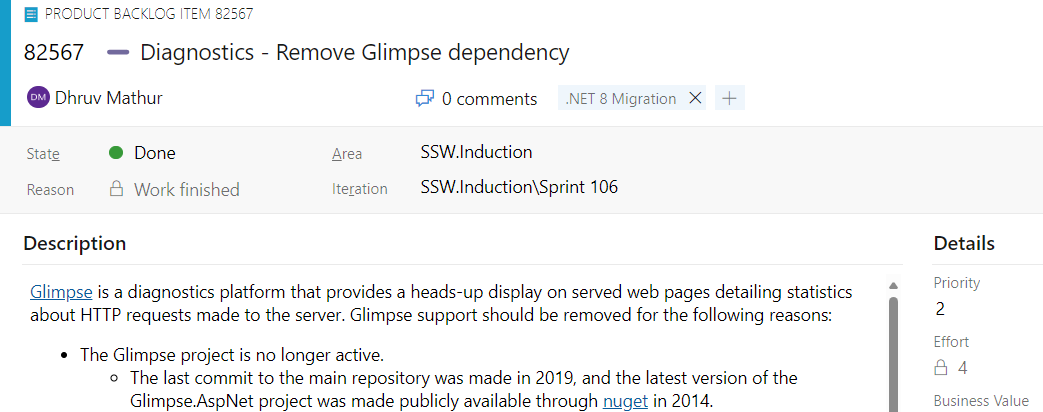
The next step is identifying the technical debt that can block or slow down .NET 8 migrations. For example, business logic that stays in the web app, dead or legacy code that uses deprecated practices, and custom implementations of out-of-the-box functionality such as authentication or logging. Once we spot technical debt, we follow the SSW Rule Do you know the importance of paying back Technical Debt? In short, we create a PBI, tag it with a .NET 8 migration label, and put it into our backlog.
3rd Party Libraries – In the next step, we perform dependency analysis to identify outdated and unsupported NuGet packages. We want to ensure that all the third-party libraries in our application are compatible with .NET 8.
#3 Migration – Review Existing Tests
Review the existing test suites to assess your confidence level in the application’s functionality after migrations to .NET 8. If test coverage is insufficient, create PBIs, tag them with migration labels, and put them in the backlog. There are various types of testing, such as integration tests to verify that the application functions work as expected when interacting with external services from API to database. You should unit test to verify calculation functions, etc.
#4 Migration – Review Project
Lastly, review all the projects in the solution, and call out the main areas you need to migrate. Either by project if it is simple, or go smaller for more complex implementations. Estimate the effort for each PBI (see Rule on PBI estimation) you created from the review and put them into the backlog. Now, you have a list of PBIs in your backlog that you can use to estimate the time needed to complete your migration and how much it will cost.
If you like to learn more about planning, check out this Rule – Do you create a Migrations Plan
#5 Tools to Help You Accelerate Your .NET 8 Migration
There are a few tools to help you accelerate your migration.
- Try-convert helps you convert your projects to the new SDK style csproj format.
- Upgrade-assistant is a .NET global tool that helps you incrementally upgrade your .NET Framework-based Windows applications.
- EFCore-PowerTools replaces outdated third-party libraries. It offers features for generating entity classes and
DbContextcode based on an existing database schema.
Migration Process – Steps to Follow
Each project is different, but below is a general plan you can follow:
✅ Step 1 – Converting the csproj file to the new SDK style format.
✅ Step 2 – Remove technical debt as mentioned in the above section.
✅ Step 3 – Ensure library projects such as non-web apps that contain business logic are .NET 8 ready (use the multitarget feature, which allows you to build your app that supports different versions of .NET simultaneously).
✅ Step 4 – Upgrade your web apps to target .NET 8.
✅ Step 5 – Perform regression testing to verify everything works as before (all functional and non-functional tests)
And that’s it – your .NET migration is done 🎉 You then need to do the front end… but that is a topic for another day.
I have found this workflow helped me to better plan our .NET enterprise migrations.
I’d love to hear if you found it helpful. Let me know in the comments…